
Google Sign in
- Go back to your Firebase console
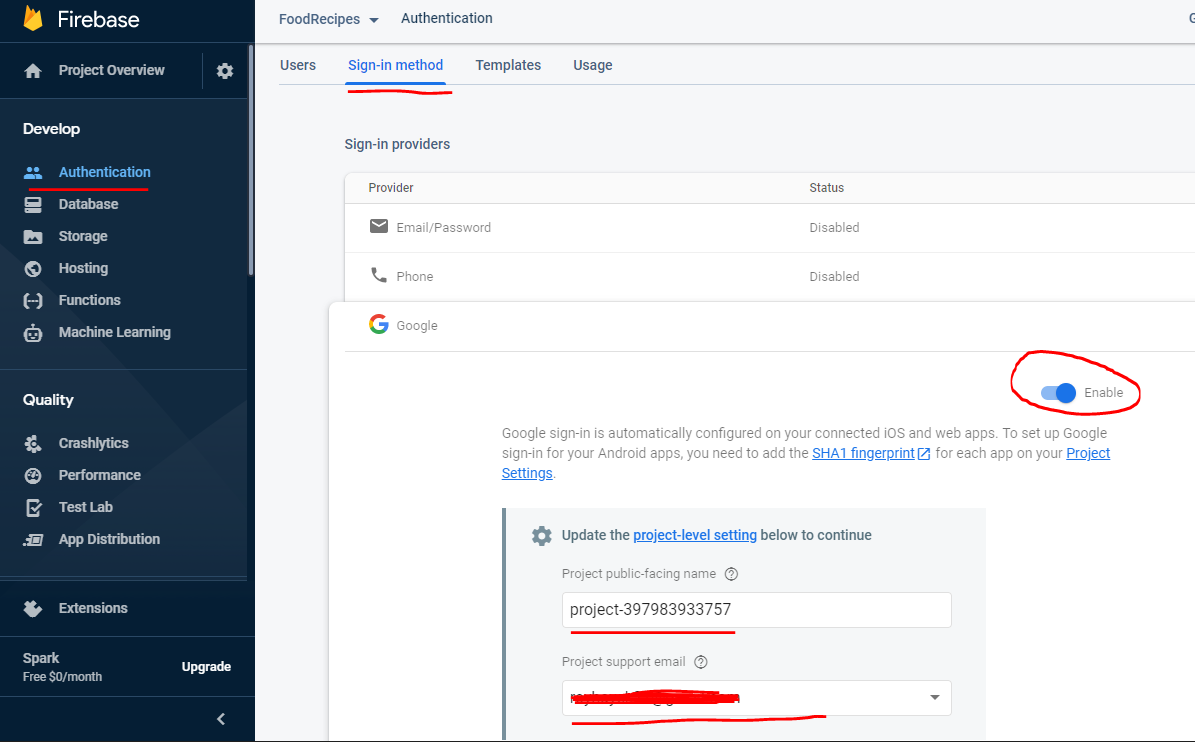
- Go to Authentication -> Sign-in method
- Enable Google and provide your support email.
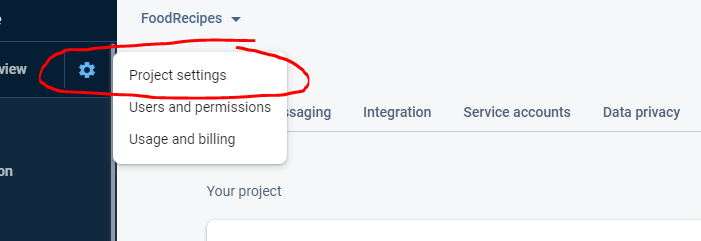
- Now go to the Project Settings
ANDROID CONFIGURATION
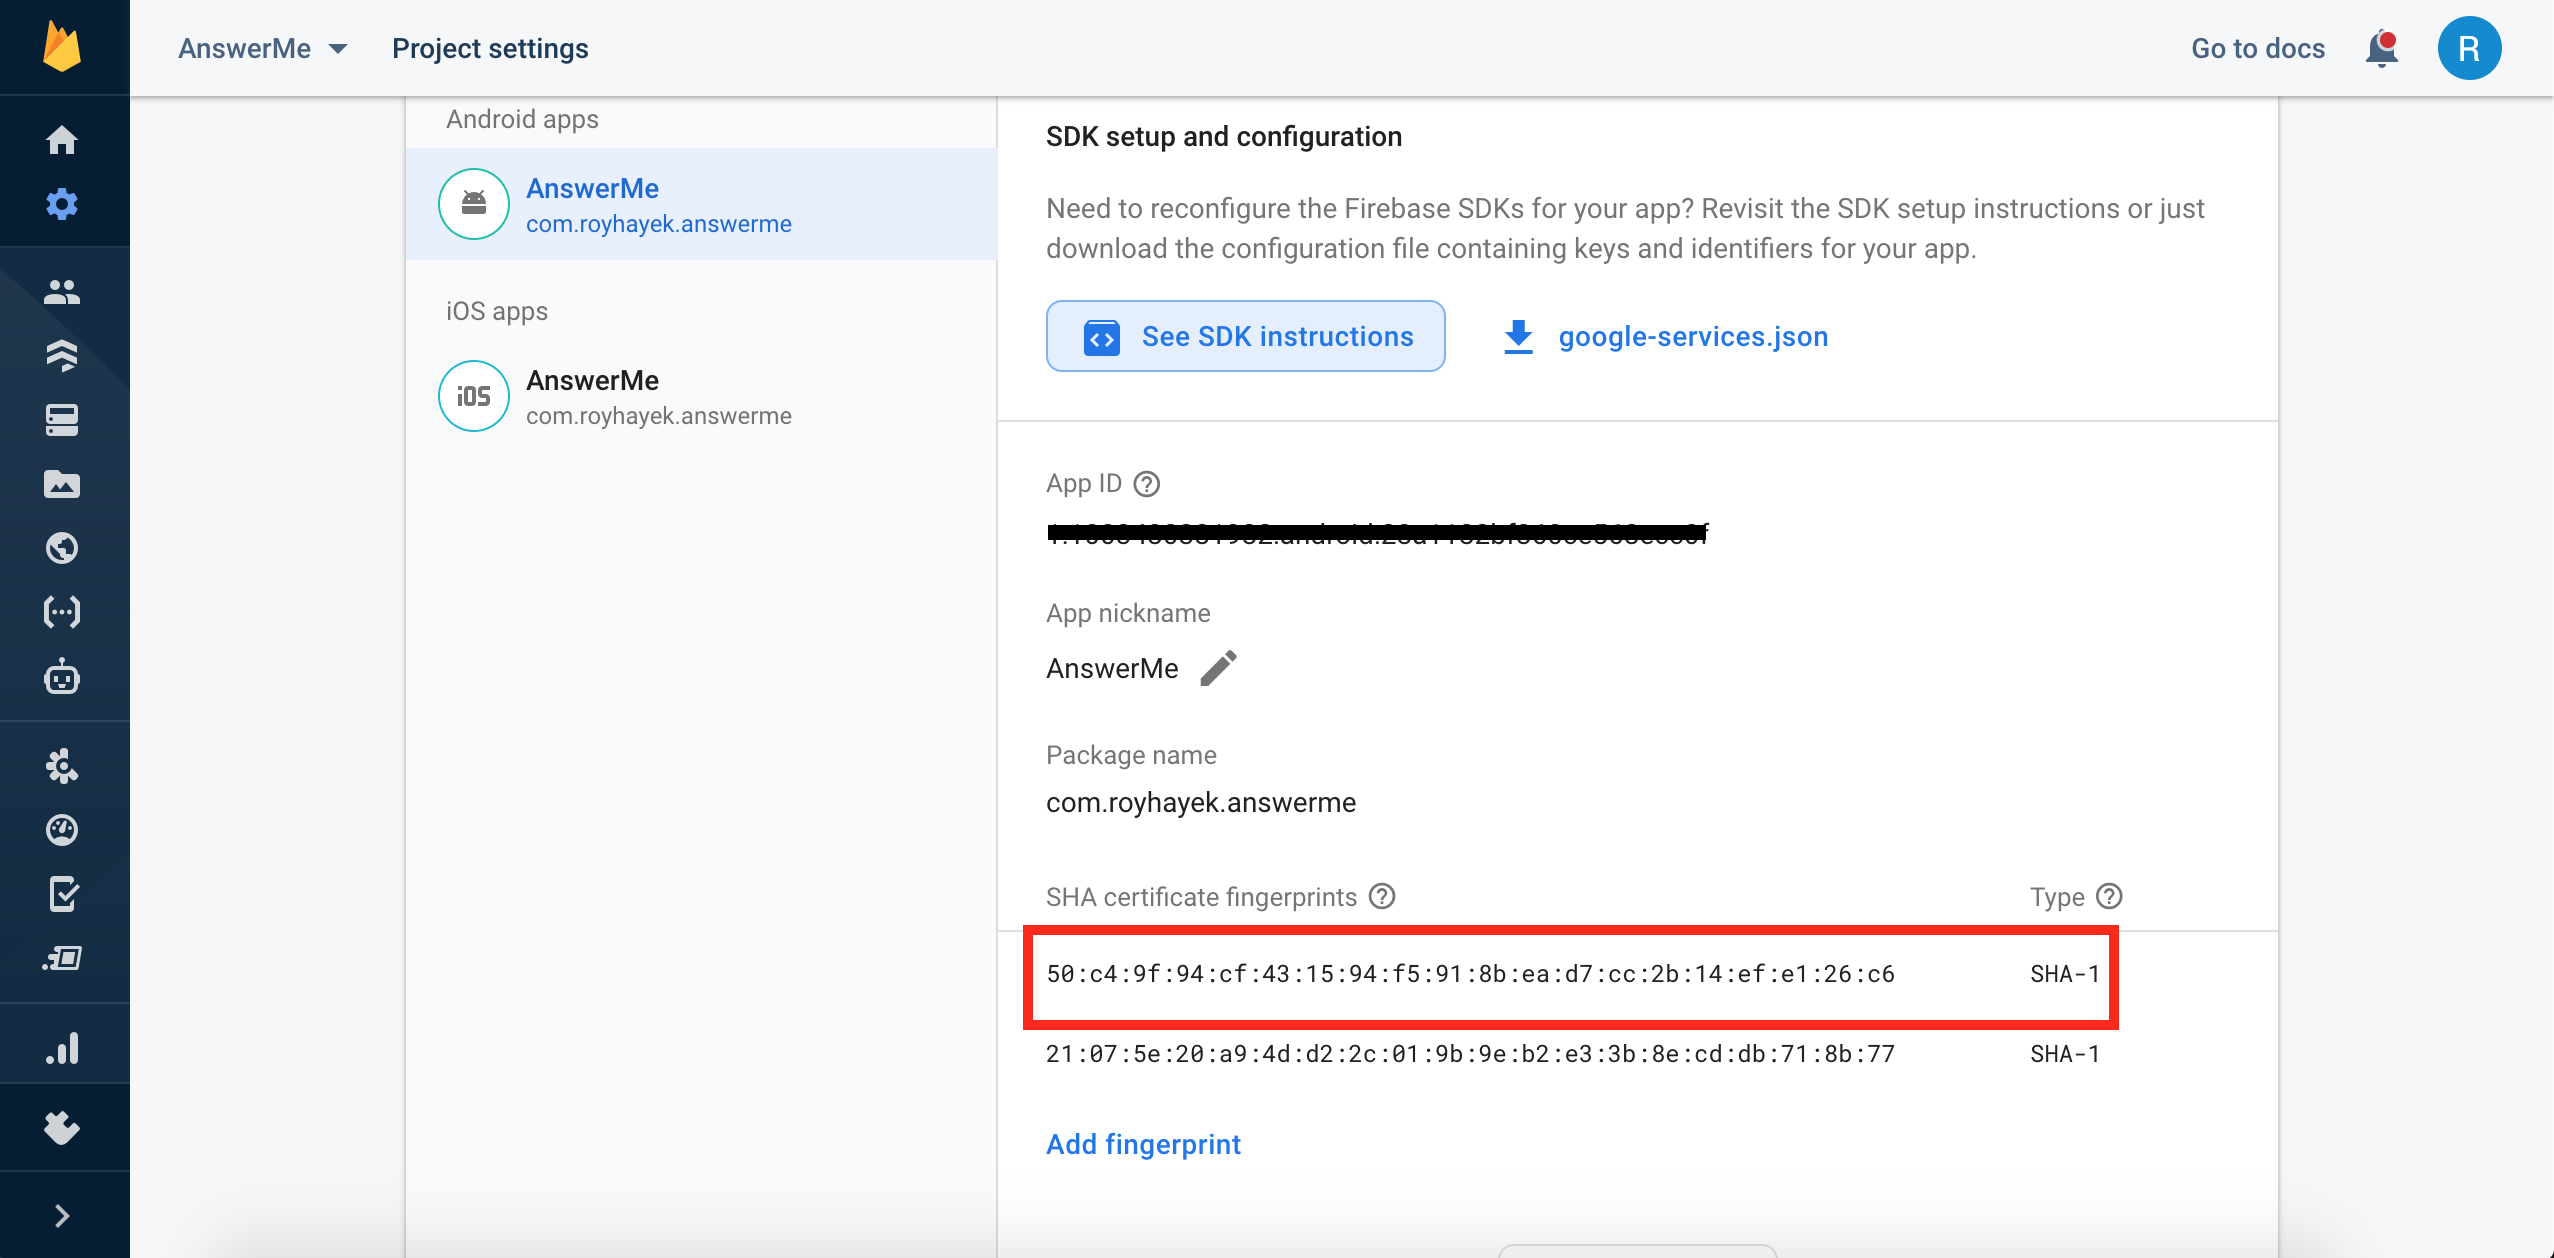
- Slide down and press on Add Fingerprint in the Android Apps section
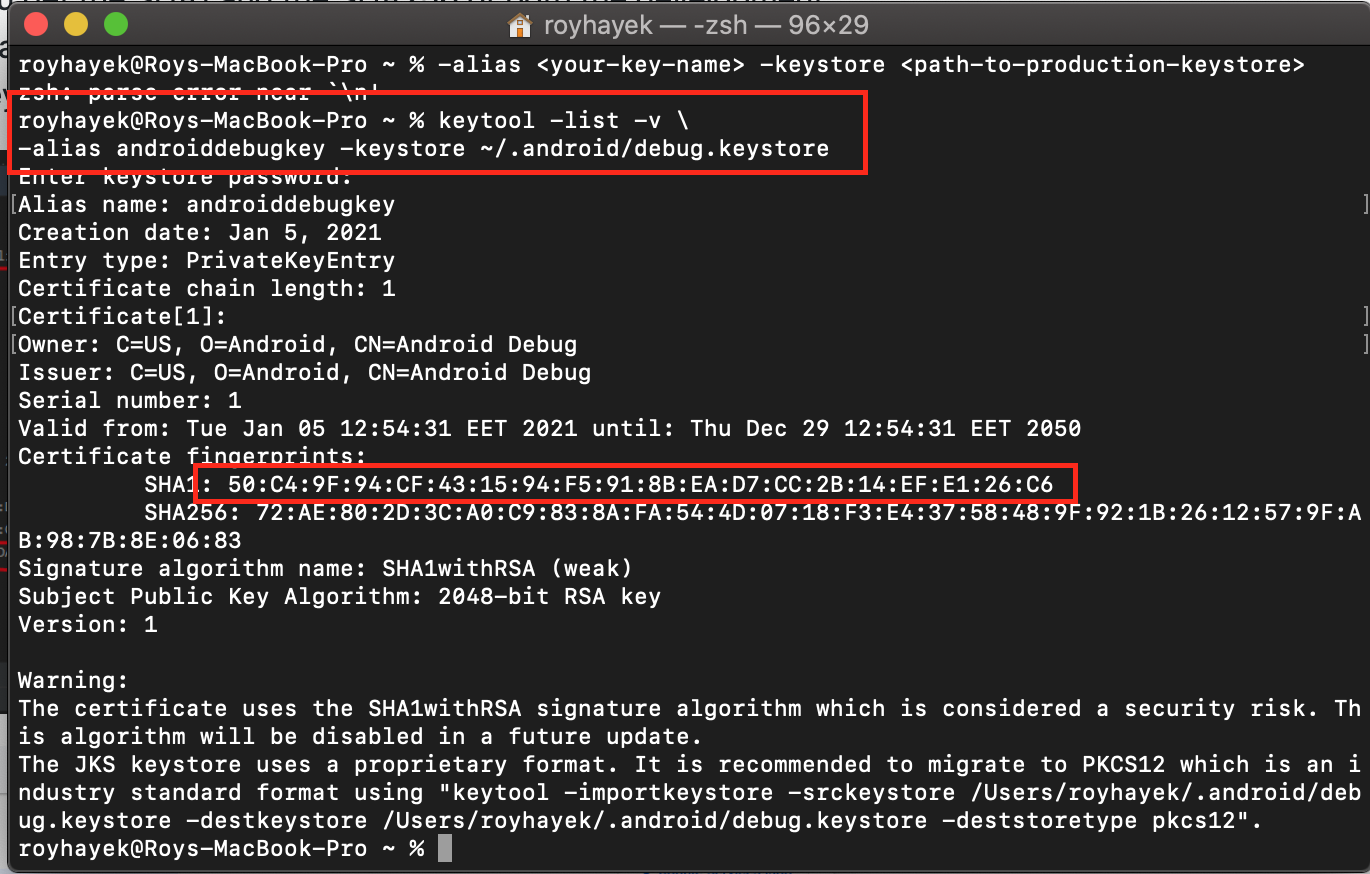
- Now go back to your Android Studio and run the following command in order to get the SHA1 and SHA256
For Mac/Linux
keytool -list -v \
-alias androiddebugkey -keystore ~/.android/debug.keystore
For Windows
keytool -list -v \
-alias androiddebugkey -keystore %USERPROFILE%\.android\debug.keystore
Note that the second command needs information from the generated signed key, if you have not generated a signed apk yet, come back later and run this second command.
After running this command you will get the SHA1 and SHA256 for development mode, we need to run the second command for the release mode. (You have to replace "key" with your .jks file name, and replace the path "C:\Users\Gamer\key.jks" to the path where your .jks is located on your machine, replace also the storepass "pass" and the keypass "pass" to your information.
keytool -list -v \
-alias <your-key-name> -keystore <path-to-production-keystore>
example:
keytool -list -v \
-alias key -keystore "C:\Users\Gamer\key.jks" -storepass pass -keypass pass
When you run the commands you get the SHA1 and the SHA256 of both the development and the release versions of your app. Copy each one and add it in your Firebase fingerprint, you will end up having 2 SHA1 keys and 2 SHA256 keys
- After that, you have to re-download google-services.json and googleservice-info.plist and replace it with your old google-services.json and googleservice-info.plist (This step is very important because the old files didn't have the SHA required for the google sign in)
IOS CONFIGURATION
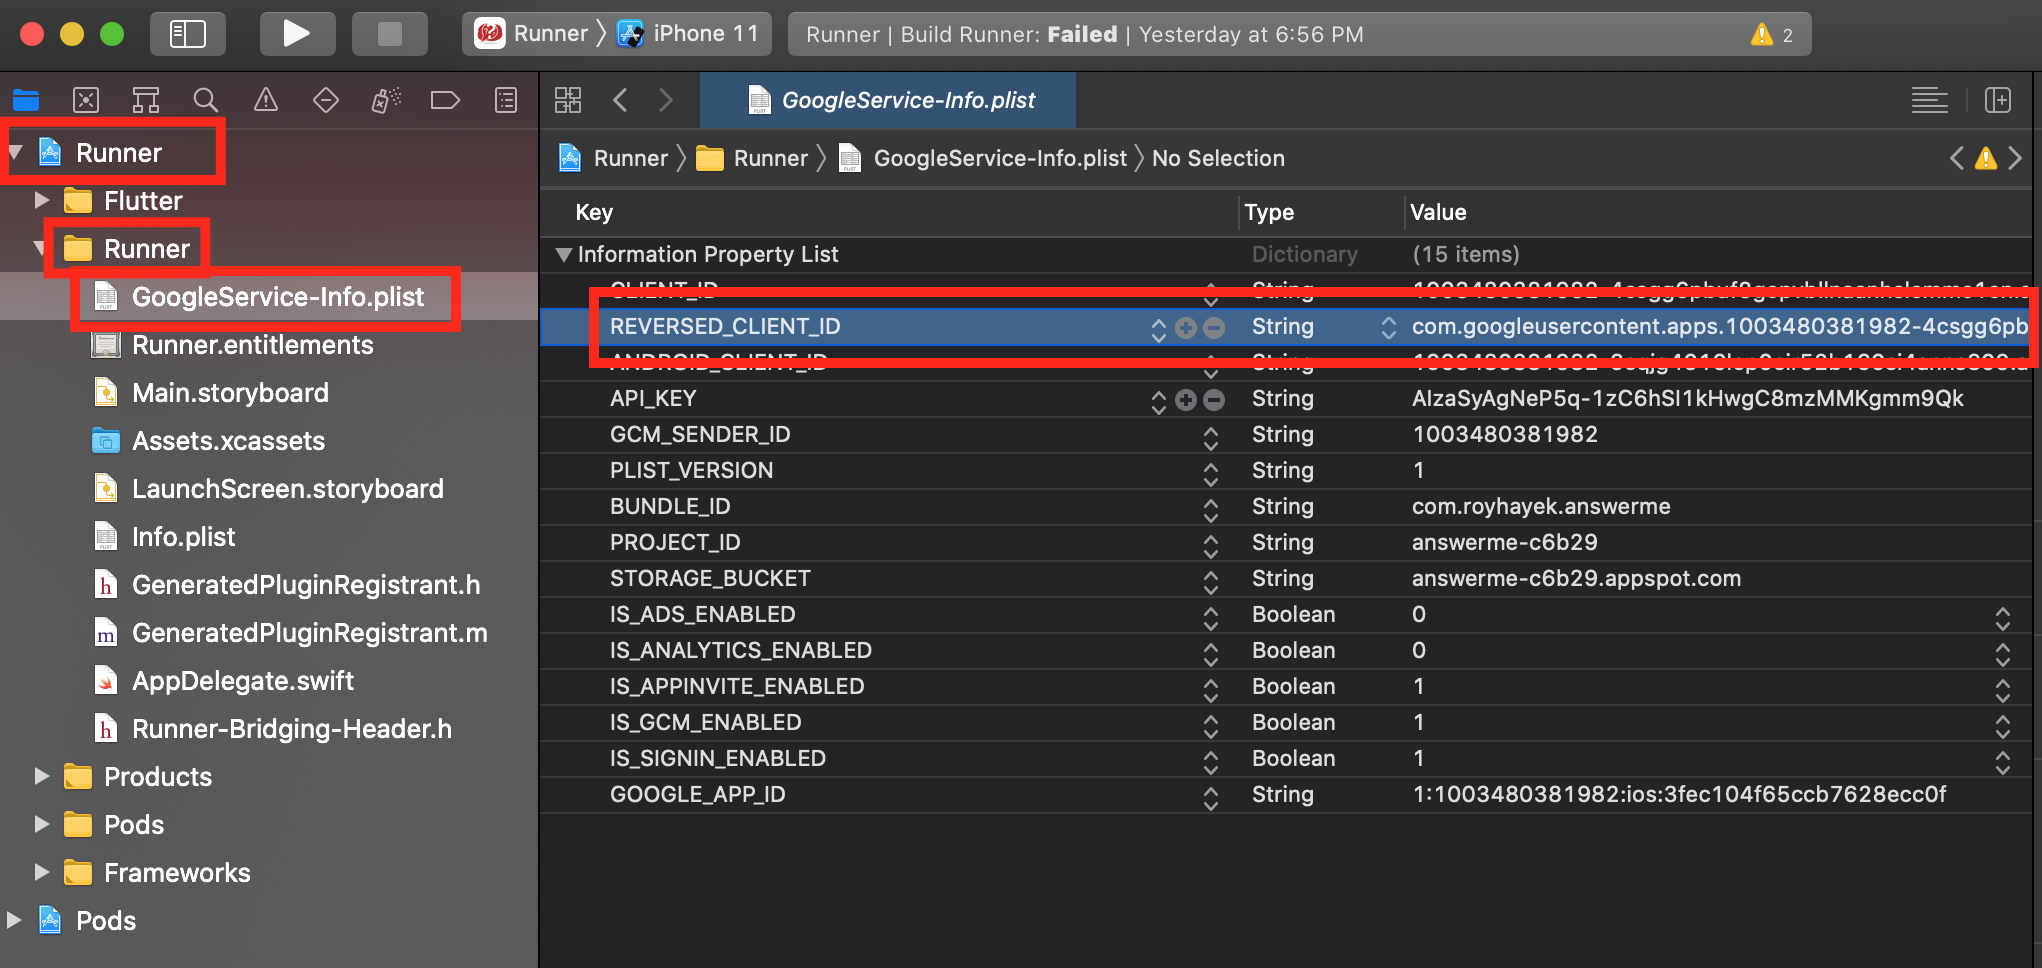
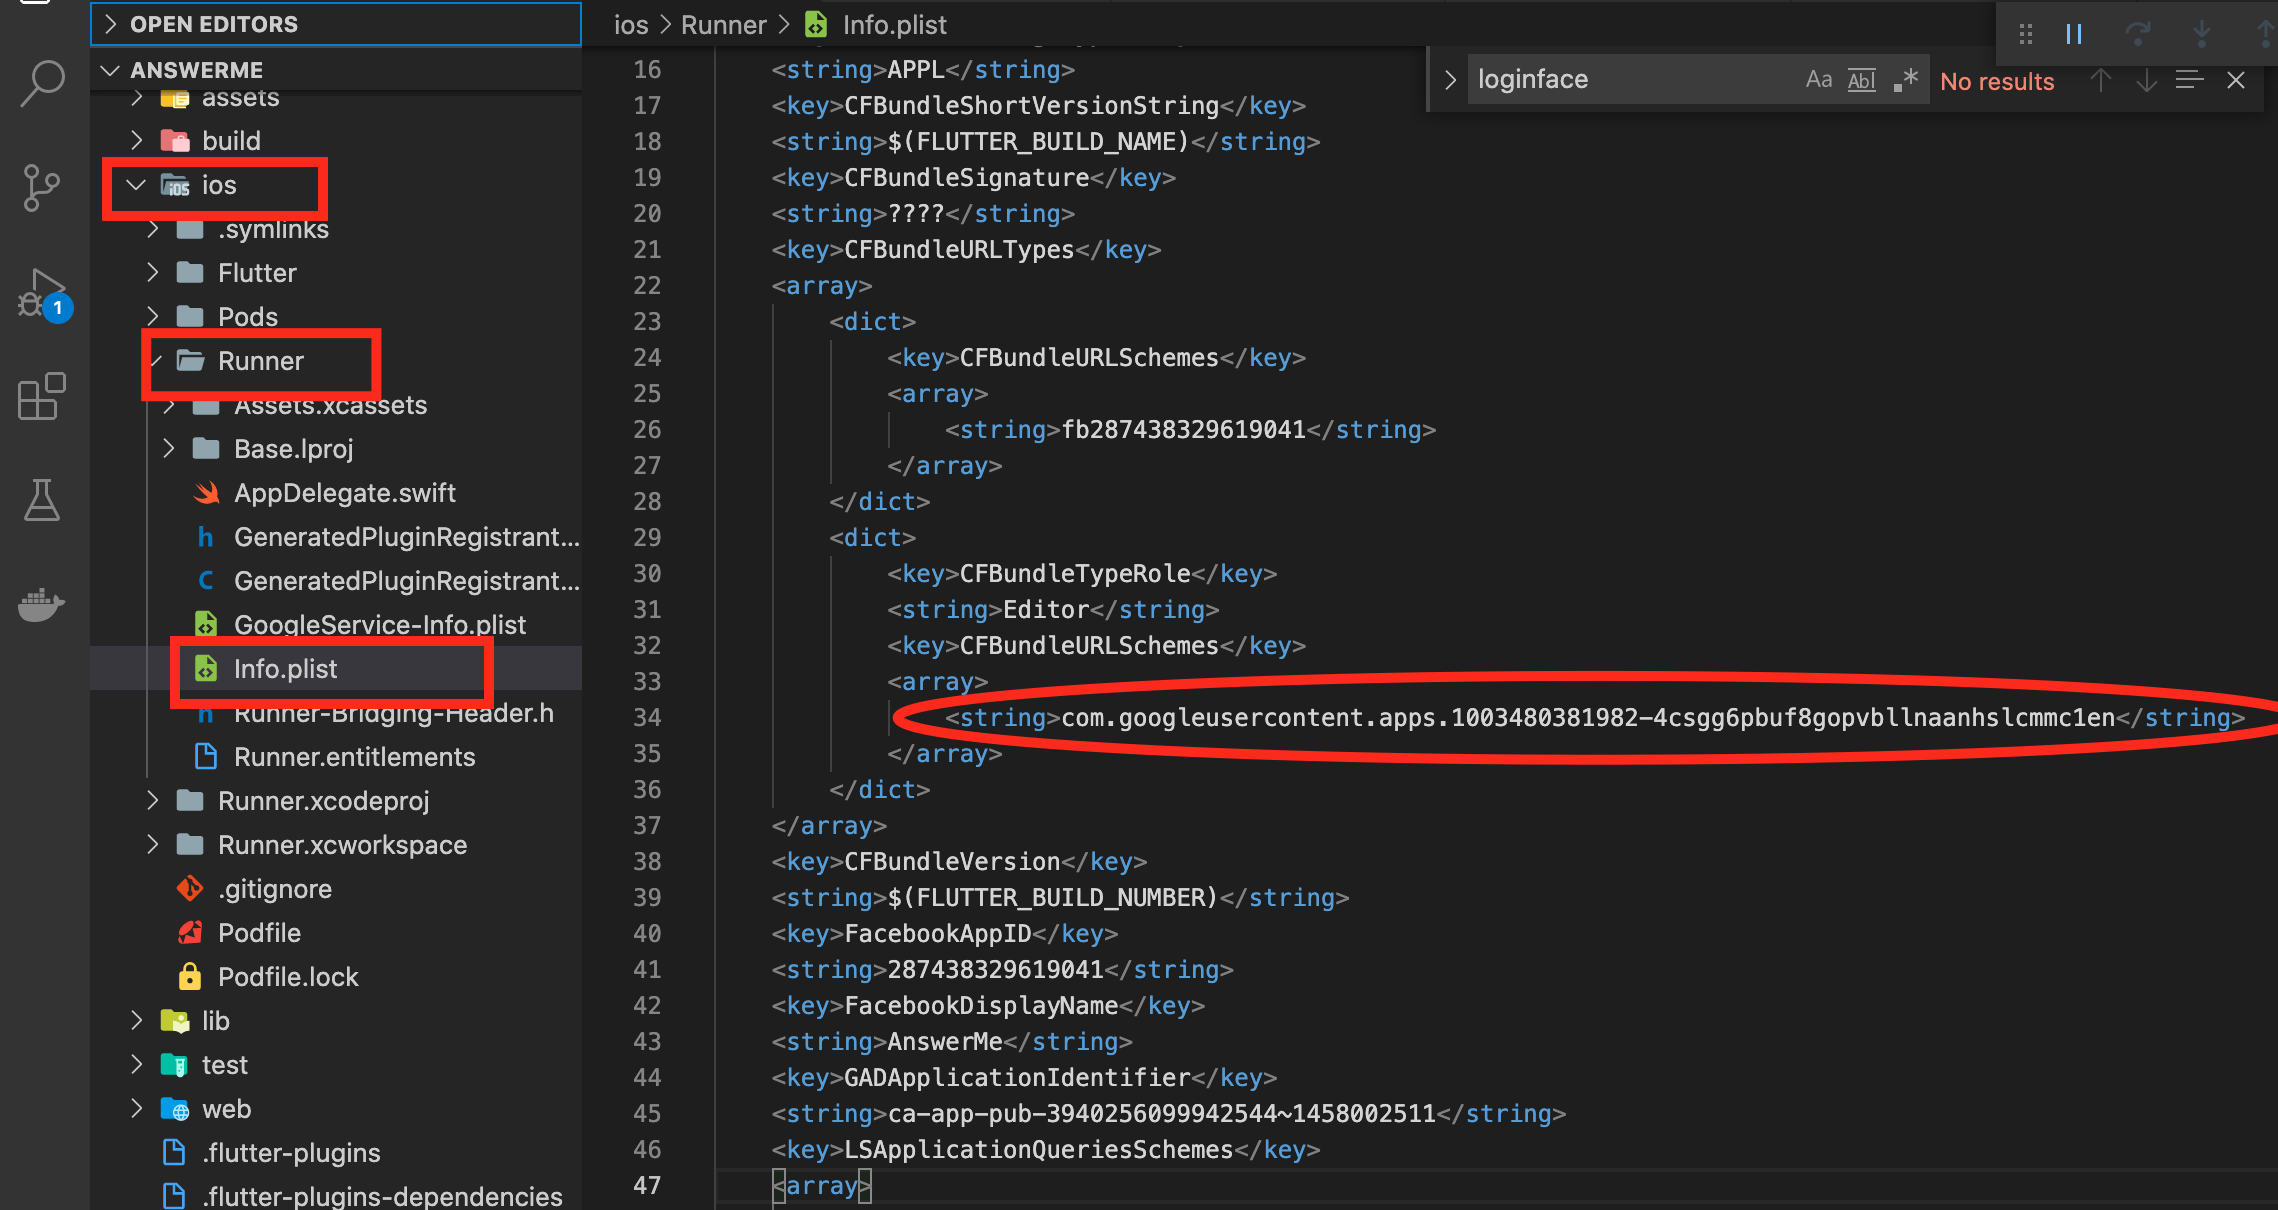
- Right click on the ios folder and press open in xcode then go to Runner/Runner/GoogleService-Info.plist there you will find a key called REVERSED_CLIENT_ID copy its value (e.g. com.googleusercontent.apps.861823949799-vc35cprkp249096uujjn0vvnmcvjppkn), go back to the flutter project then to /ios/Runner/Info.plist and change the CFBundleURLSchemes value the one you copied previously.
The package setup can be found here: https://pub.dev/packages/google_sign_in