
Installation
Requirements
The followings are required to install the admin panel on a host:
- PHP Version: 7.4 or 8.0
- MySQL Version: >= 5.x
- Application server: Apache, Nginx
- IMPORTANT: The script can only be installed directly in domain or subdomain.
Prepare to install
Installing the panel is very easy and you'll be able to install it without any coding knowledge. The installation process includes three major steps:
- Creating domain or subdomain
- Creating a database
- Uploading script files to the host
Installation on Shared Hosting
Plesk, cPanel, hPanel and other hosting managers are recommended. In this guide, we will use hPanel (Hostinger) but similar should be for others.
1. Create your domain or subdomain in your shared hosting
To host it on Hostinger you need to create a subdomain or domain ex. answerme.royhayek.com or answerme.com
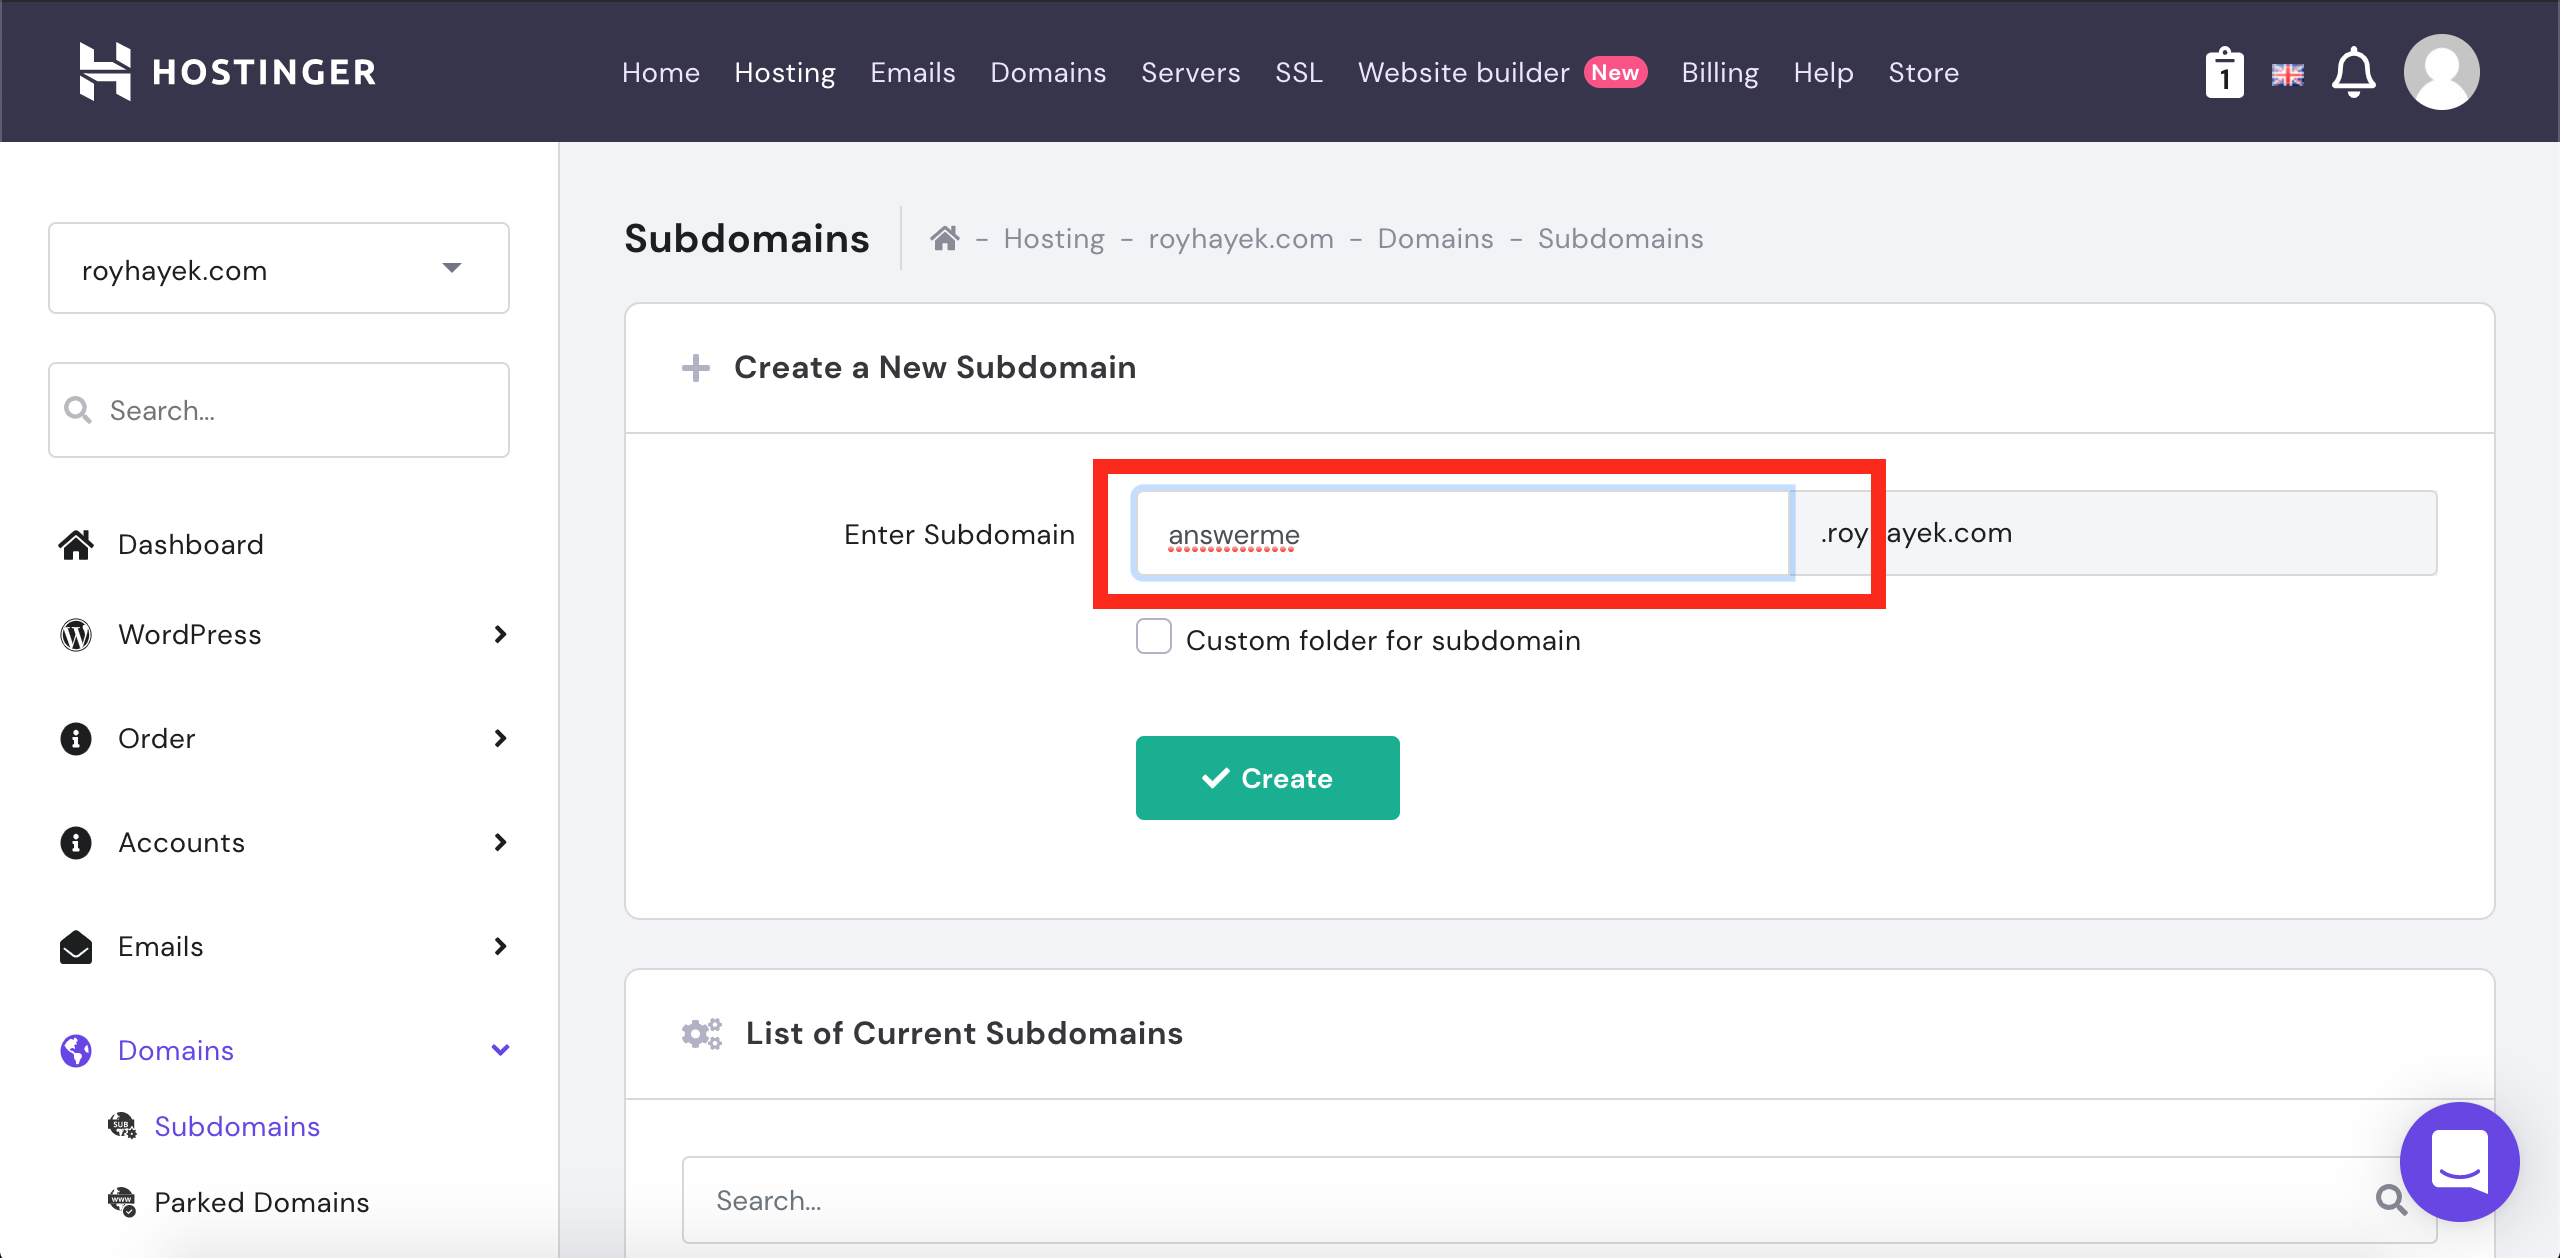
After you have created that, you will be able to access the file manager for that domain/subdomain Delete any default files that are maybe added.
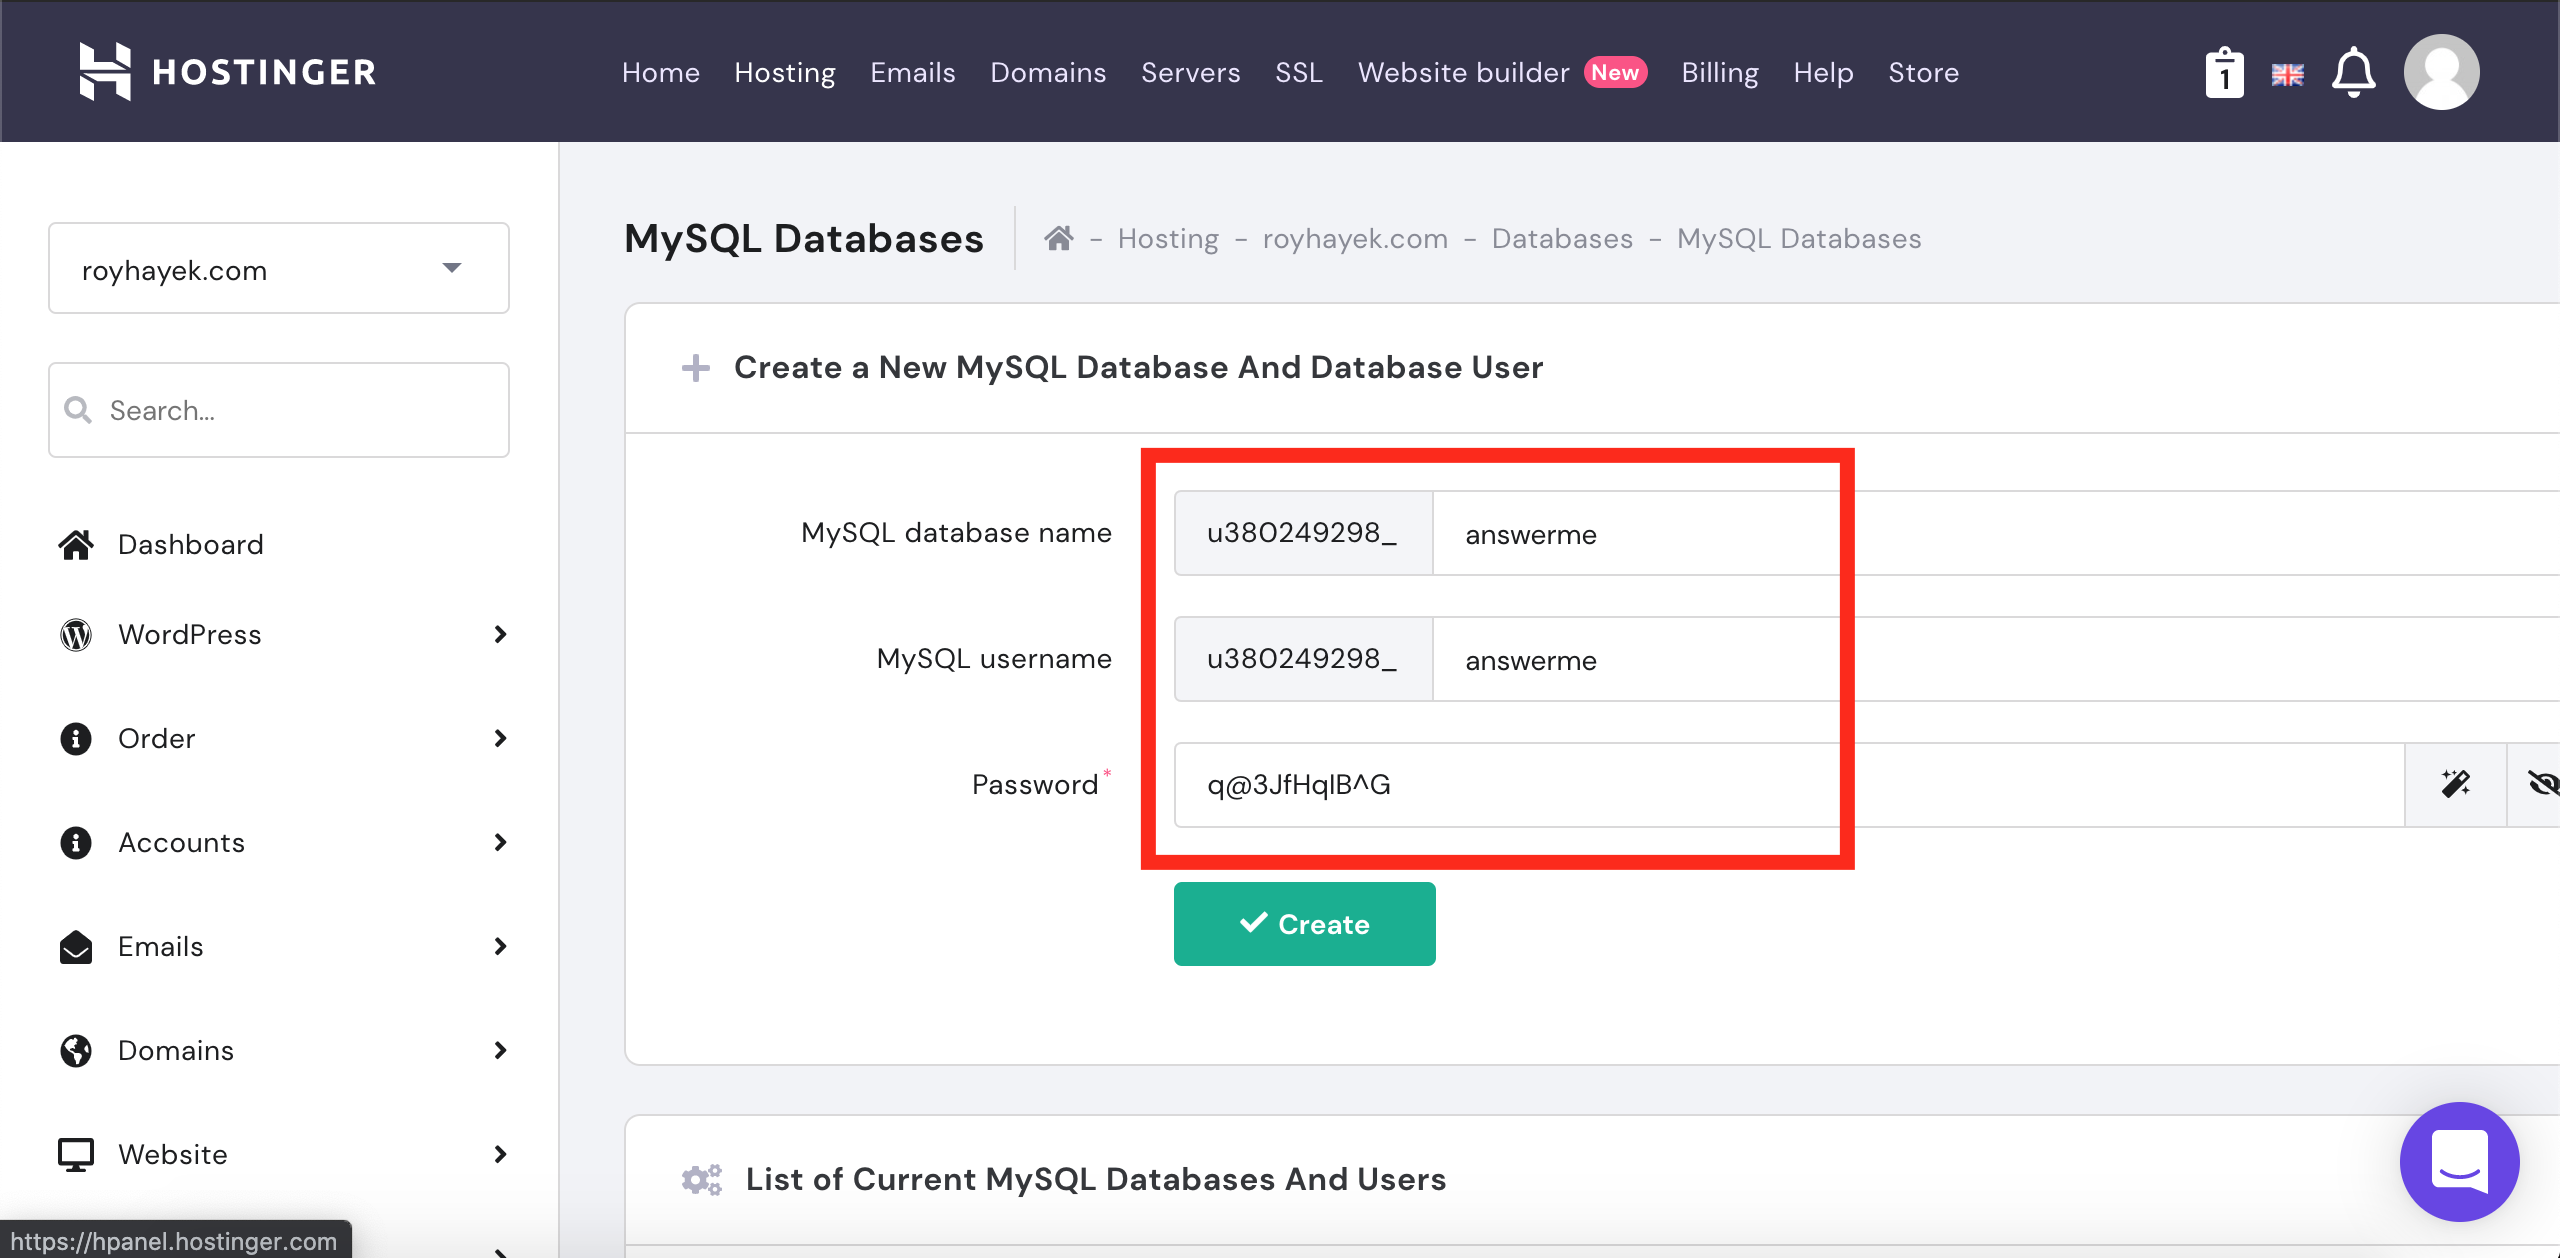
2. Create a database
Create an empty database in your shared hosting and remember this credentials
- db name
- db username
- db user pass
as shown in the picture below:
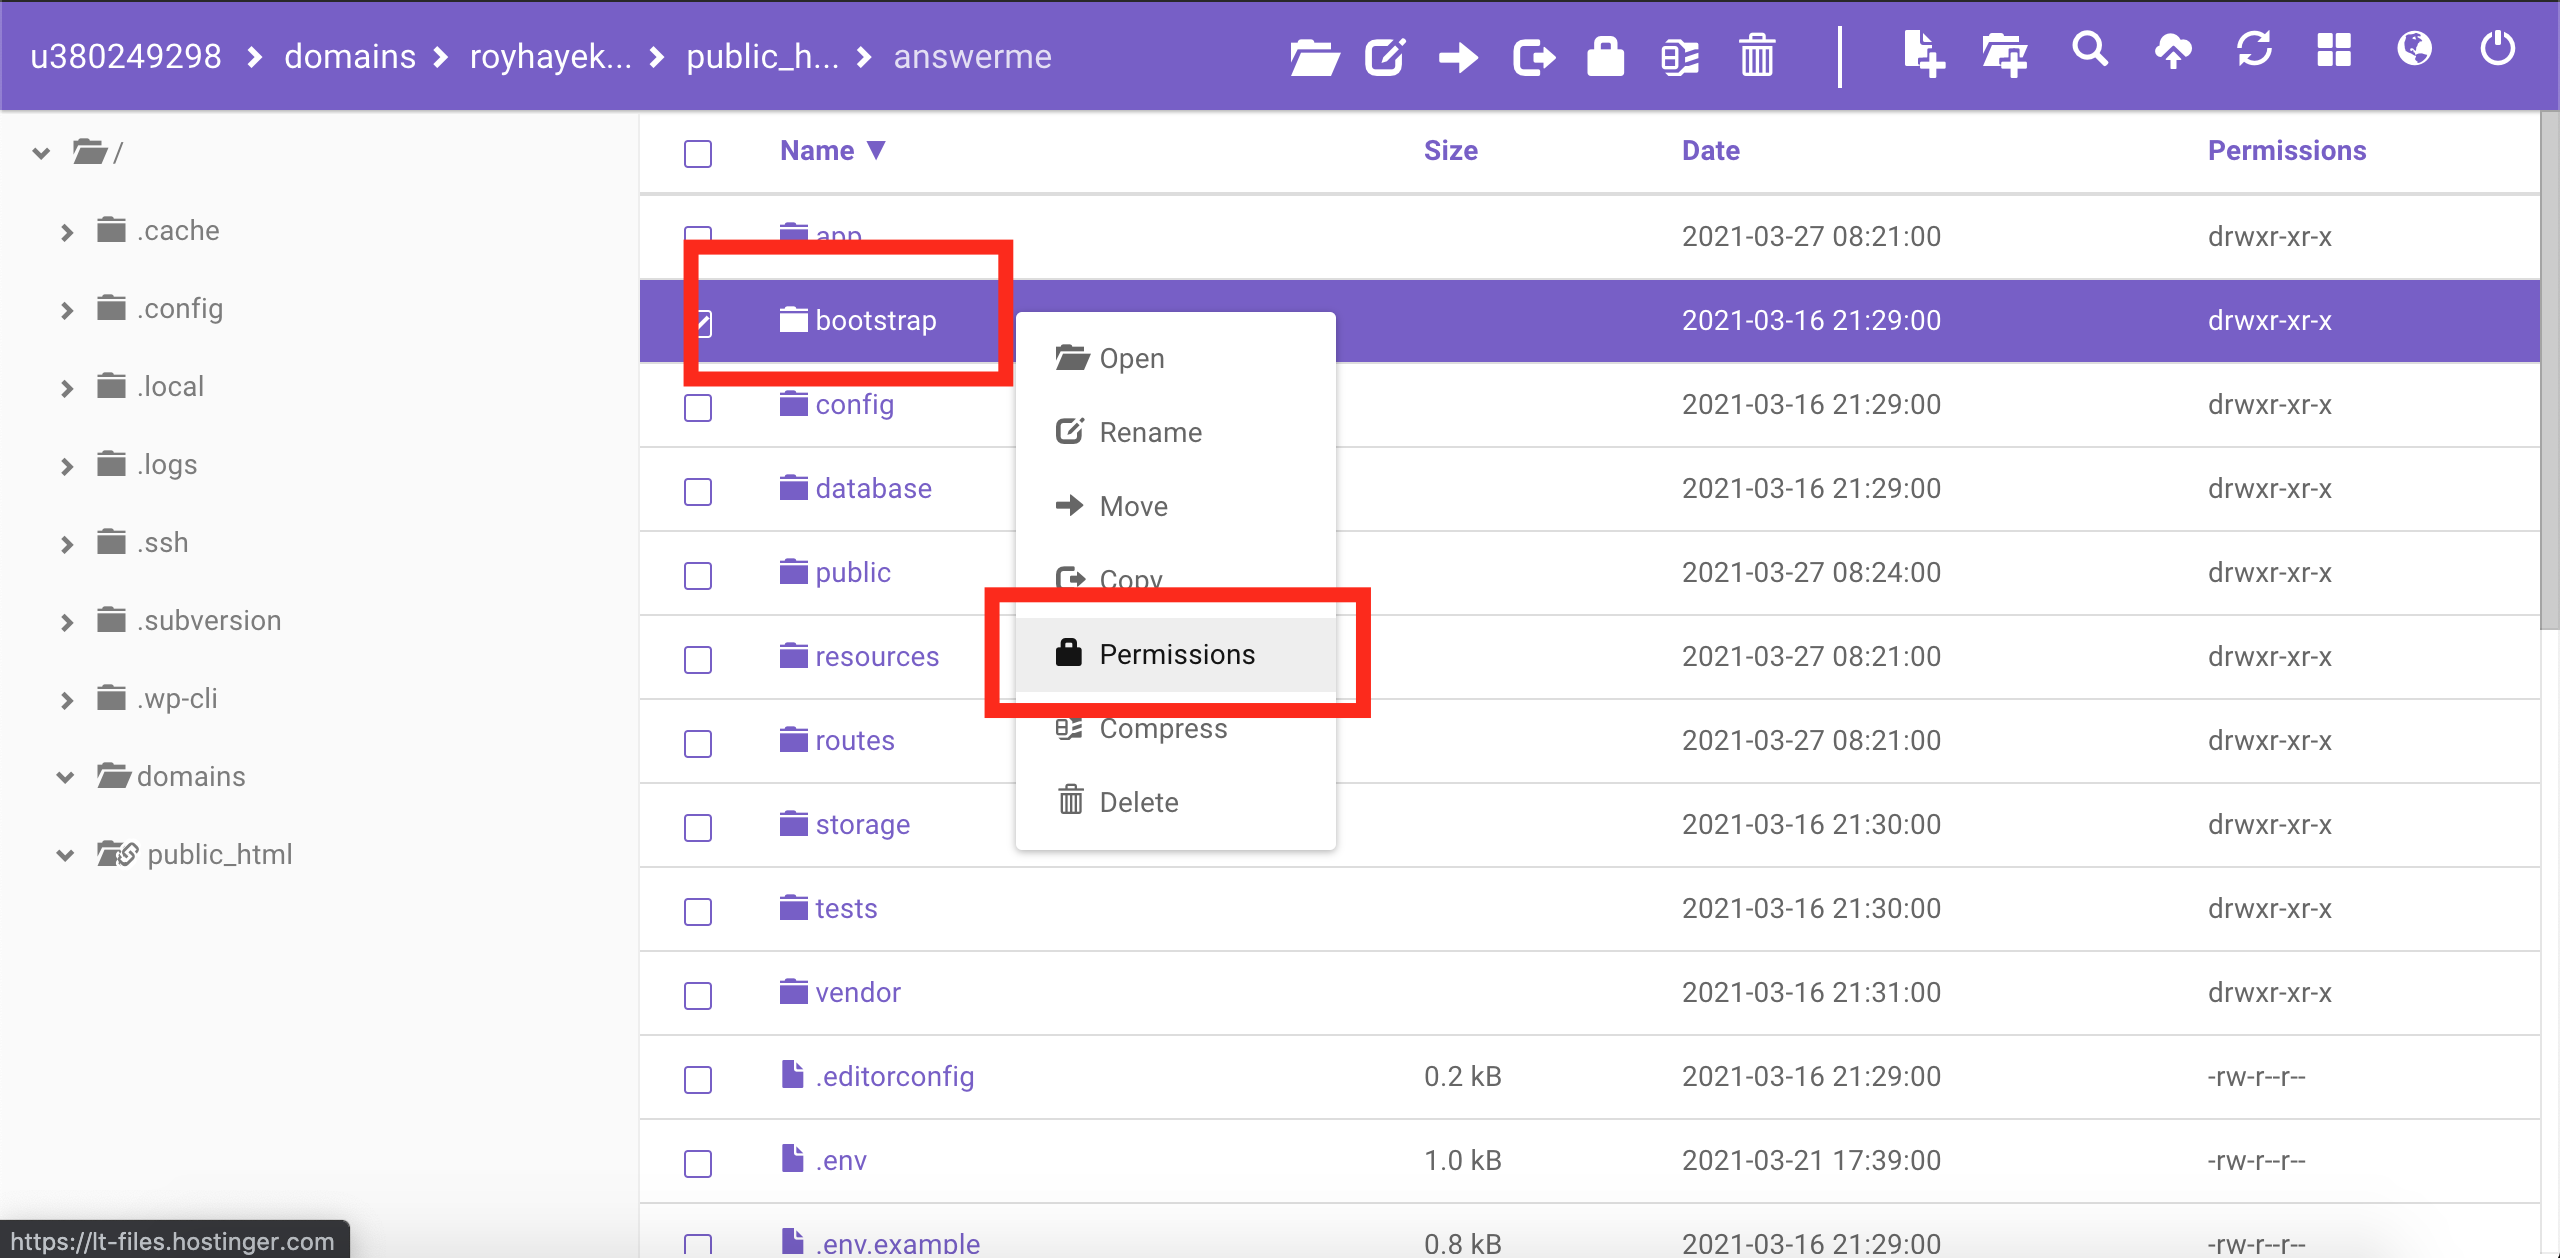
3. Upload the source code you have downloaded from CodeCanyon and unzip it (found in admin_panel folder)
Then Enable writing permissions for the “storage” and “bootstrap” files. It should be 775 or 777
4. Now navigate to the web url where your project is located
ex. mydomain.com or subdomain.mydomain.com
5. Environment Configuration
As we already mentioned environment configuration requires many steps but just for the beginning we will need only several configurations:
open the .env file and start editing
- Applications Basics These are the first variables you will need to change.
APP_NAME=Application name goes here
APP_ENV=production
APP_URL=Your website url goes here
- Database Configuration Click on the article below to continue with the database configuration.
You will have the option to modify and add .env values later on.